How to Use Salesforce Data Loader
Salesforce Data Loader is a tool that helps you to load data into Salesforce.com from various sources, including CSV files and relational databases. This guide will show you how to use Salesforce Data Loader to load data into your Salesforce org.
Prerequisites:
To be able to use Salesforce Data Loader, you must install Java Runtime Environment (JRE) version 11 or later.
Download Data Loader:
1. Navigate to the Setup menu in Salesforce and head to the Data Loader tab.
2. Under the Install heading, click on the Download Data Loader link.
3. On the next page, click the Download button to download the Salesforce Data Loader installer.
4. Once the installer has been downloaded, run it and follow the on-screen instructions to install the Salesforce Data Loader.
Permissions:
To be able to use the Salesforce Data Loader, you must have API Enabled, and profile/permission set access to the objects/fields that need to be updated.
Grant these permissions:
1. Click on the Manage Users link in Setup and select the Profile tab.
2. Under the Set Permissions heading, find the object you want to update and click on the Edit button.
3. On the next page, find the field you want to update and click on the checkbox next to it.
4. In the Permissions section, select the API Enabled checkbox and click on the Save button.
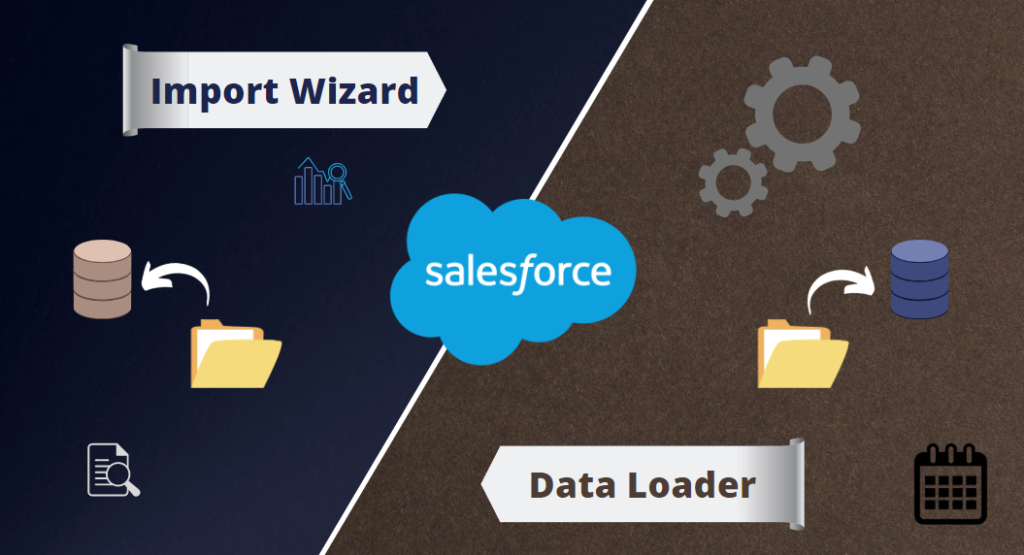
There are several types of “loading”:
There are several types of Salesforce Data loader functions: insert, update, upsert, export & export all, and delete & hard delete. They are used to put data into or take data out of Salesforce.
- Insert: With the insert function, you can add new records to Salesforce.
- Update: With the update function, you can change information in existing records.
- Upsert: The upsert function combines the insert and update functions. This means that if a record already exists in Salesforce, it will be updated with the new information. If the record doesn’t exist, it will be inserted into the system.
- Export & Export All: Export is used to export information out of the system into a CSV format.
- Delete & Hard Delete: The delete function deletes records from the system.
Walkthrough: Using Salesforce Data Loader
This walkthrough will teach you how to use the Data Loader to import data into your Salesforce organization.
To use the Data Loader, you must first log in to your Salesforce organization. The Sandbox environment has a different login URL than the Production environment. For more information, see “Salesforce Login URLs” in the Salesforce Help.
Once you have logged in, select the object whose data you want to import. For this walkthrough, we will use the Account object. The Data Loader can be used to import data into any of the standard or custom objects in Salesforce.
Next, select the type of loading you want to perform: Import or Export. The Export option does not have the uploading of the CSV option.
The next step depends on which type of loading you selected: Import or Export. If you selected Import, you would need to map the fields in your CSV file to the fields in your Salesforce object. The Data Loader provides two options for field mapping: Manual Field Mapping and Auto-Matching Field Mapping. For more information, see “Field Mapping” in the Salesforce Help.
If you select Auto-Matching Field Mapping, any fields that do not match will be skipped. If you want to include these fields, you can use the Special column in your CSV file. The Special column is used to indicate which fields should be included, even if they do not match the fields in your Salesforce object.
If you selected Export, all of the fields in your Salesforce object would be exported to a CSV file. The CSV file will be automatically downloaded to your computer.
The final step depends on which type of loading you selected: Import or Export. If you selected Import, you will need to specify a batch size and specify a location where the Data Loader should save its log file.
If you selected Export, no additional steps are required. The Data Loader will export the data from your Salesforce object and automatically download the CSV file to your computer.
That’s it! You’ve now learned how to import and export data between your Salesforce organization and a local CSV file using the Salesforce Data Loader.
Let’s have a look and briefly explain terms you should be familiar with when data loading:
Differences between Manual Field Mapping and Auto-Matching Field Mapping:
The main difference between the two field mapping options is that Manual Field Mapping requires you to map the fields in your CSV file to the fields in your Salesforce object manually. Auto-Matching Field Mapping will automatically match the fields in your CSV file to the fields in your Salesforce object, provided that they have the same name.
What is batch size?
Batch size is the number of records that the Data Loader will import or export at one time. The larger the batch size, the longer it will take to complete the loading process. However, smaller batch sizes may cause errors if there are too many records to process at one time.
The best way to determine the right batch size for your data is to experiment with different sizes until you find one that works best for your system.
Insert Null Values:
The ”Insert Null Values” option is used to insert blank values into a Salesforce field. This is useful if you have a cell on your CSV file that is blank and you want to delete the data from this field.
To use this option, select the checkbox next to ”Insert Null Values”. When you are finished, click ”Map Fields”.
Assignment Rules:
The primary use of assignment rules is to automatically assign leads or cases as they are inserted or updated. This can be helpful in ensuring that leads or cases are always assigned to the correct person or department. Assignment rules can also be used to route leads or cases to a specific queue or to assign them to a specific salesperson. The assignment rule ID can be found on the setup page.
Set Create and Last Modified date on insert:
Salesforce can set the date a record was created and the date it was last modified when you import data using the API. This will make it look like the records were created at that time on your old system. To do this, you will need to enter the date in the ”Created Date” and ”Last Modified Date” fields in the CSV file. The format for these dates is ”YYYY-MM-DD HH:MM:SS”.
Conclusion:
Now that you understand the different types of loading and what each one entails, it’s time to choose which type is best for your needs.
If you’re unsure about which type of loading to use, we recommend starting with Export. This will export all of the data from your Salesforce object into a CSV file that can be easily opened in a spreadsheet program like Microsoft Excel or Google Sheets.
From there, you can experiment with the different batch sizes and field mapping options until you find a process that works best for you.
If you’re still unsure about which type of loading to use or if you need help setting up your import or export process, our team is here to help. Contact us today for more information on how we can assist you in getting the most out of your Salesforce data.
Happy data loading!
One thought on “How to Use Salesforce Data Loader”